One of the most touted features of Windows 11 is its ability to run Android apps. As of this writing, the final version of Microsoft’s operating system still doesn’t run Android, but if you’re a Windows Insider in the dev, beta, or release channels, you can now.
There are a few caveats about running Android apps in Windows 11 and the biggest one is that Microsoft doesn’t want you to install apps from Amazon’s store which has a limited selection and none of the Google apps. . Luckily, there’s a way to download apps, but you still can’t use any that require Google services.
Below we will show you how to setup Android Subsystem for Windows and install apps officially through Amazon store. Next, we’ll show how to load them sideways.
Requirements to Run Android Apps in Windows 11
Before you start running Android apps, you need to install and configure the Android Subsystem for Windows, which enables emulation. To do this, your PC must meet two requirements.
- Windows 11 Insider Build 22000.282 or higher. If you are not a Windows Insider, you will need to register by going to Settings->Windows Update->Windows Insider.
- Virtualization enabled. To check if it is enabled, launch Task Manager and go to the Performance tab. There, in the lower right, there will be a line that says “Virtualization: Enabled” (hopefully). If it is not enabled, you need to enter your BIOS and enable it there.

How to Run Android Apps in Windows 11
Provided your PC has the correct version of Windows 11 and virtualization enabled, there are a few things you need to do for Android apps to work.
1. Navigate to the Windows Subsystem for Android webpage. In theory, you can also search for this app in the Microsoft Store, but in our case, it didn’t show up in search.
2. Click the Get button, which is labeled Install/open if you already have it installed. The Windows Subsystem for Android menu will open in the Microsoft Store app.

3. Click the Install button in the Microsoft Store app. An overlay menu appears with information about the Amazon app store.

4. Click Next.

5. Click Download.

You will have to wait a minute or two while the app downloads.
6. Click Open Amazon Appstore. A screen opens with an Amazon login prompt on it.

It may take a minute or two to open.
seven. Click on “Connection” or the “Create a new Amazon” account buttons. If you have an Amazon account of any kind – and most people do – you can simply choose to log in with that account. You will be prompted to login after clicking the button.

The Amazon Appstore screen will appear with a list of all Android apps you can currently install in Windows 11.
8. Click “Get” for an app you want to install. You can also click on the app icon to learn more before deciding to download it.

9. Click Install to confirm.

Any recent Android apps you install will be accessible, like any other apps, through the Start menu or Windows Search.

When you launch each app, if it’s the first Android app you’ve opened in that session, it will launch the underlying Windows Subsystem for Android. This may take several seconds.

If you closed the Amazon Appstore app, you will need to relaunch it if you want to discover and install more Android apps.
How to Sideload Android Apps in Windows 11
Since the Amazon app store has such a limited selection of Android apps that can run on Windows, you’ll want to try downloading apps. On an Android device, sideloading apps are as simple as enabling sideloading in settings, then using a file manager app to locate and tap the APK installer file for the program you want .
However, in Windows Subsystem for Android, there are two ways to sideload an application. The simple method, which we’ll cover below, is to install an app called WSATools and use it to do the installation for you. The hardest way is to install Android Developer Bridge, a set of tools for programmers, and use commands to push the APK file to the Windows Android environment. Since WSATools seems to work fine and is much easier, we’ll continue with that.
1. Install WSA tools from the Microsoft store. You can get there by visit their store url and clicking the Get button.

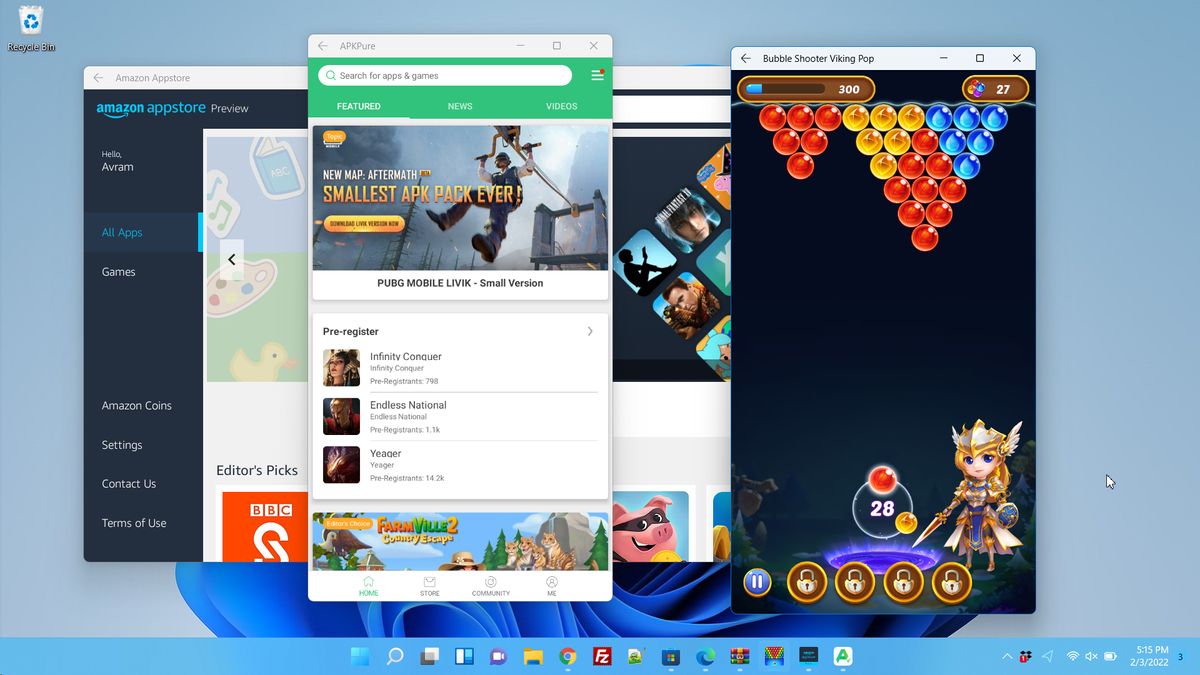
2. Download (or otherwise obtain) an APK file. The easiest way to get APK files is to visit a reputable site that hosts them, such as APKMirror Where APKPure.
In testing, we found that APKPure seems to have a much wider selection of apps, but many are stored in XAPK format which WSATools doesn’t install. To install these XAPK files, you need to download APKPure’s own app as APK and install it using WSATools. Then you can run the APKPure app to search its library and install apps directly.

3. Launch WSA tools on your PC.
4. Click Select APK and choose one from your storage drive.

5. Click Install. Installing the app may take a minute or two.

You can now choose to open the app or install a different one.

Whatever apps you download will be available in the Start menu so you can always find them the same way as other Windows and Android apps.